The best grapes to grow for eating are ones that taste great off the vine, ripen reliably in your climate, and don't drive you crazy with disease problems. That combination is more specific to your region than most gardening articles will admit. A variety that produces sweet, juicy clusters in California may sulk and rot in Ohio. So before we get into the fun part (actual variety names), let's make sure you're picking for the right reasons and the right place.
Best Grapes to Grow for Eating: Top Table Varieties
Marcus Whitfield
19 Apr 2026
What 'best for eating' actually means in a table grape
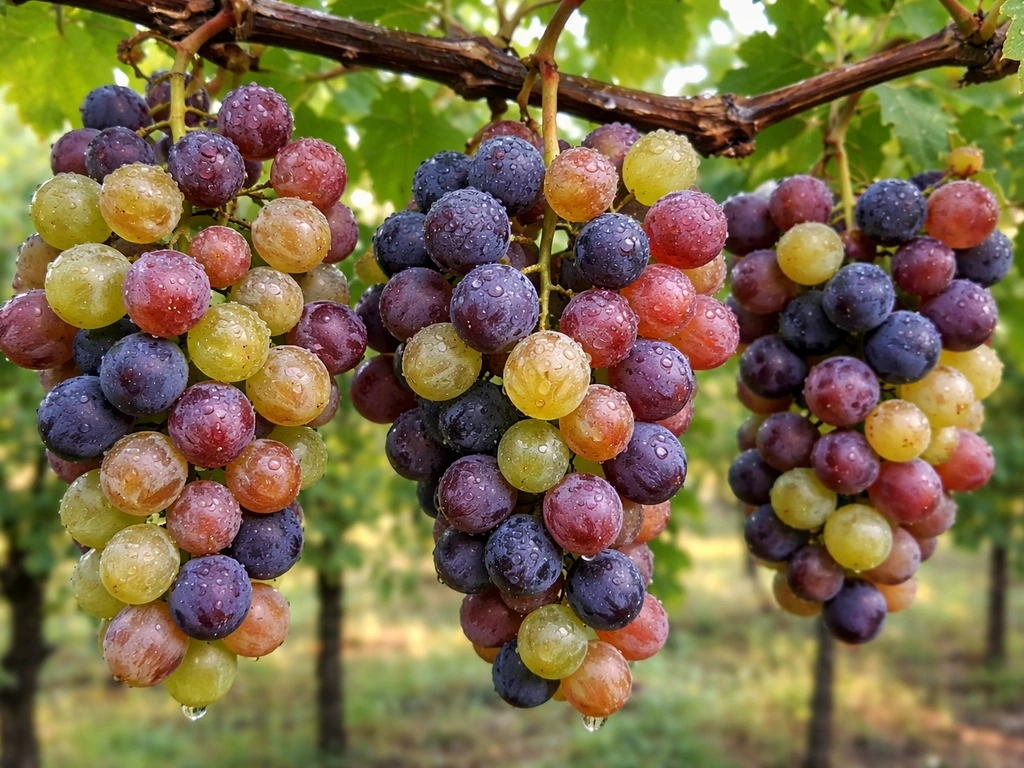
Table grapes are a different category from wine grapes, and choosing for fresh eating means prioritizing a completely different set of traits. You want fruit that's enjoyable to eat straight off the cluster, not fruit that's been engineered for fermentation. The key traits to look for are:
- Sweetness and flavor: Look for varieties with high sugar content and complex flavor, not just sweetness. Brix (soluble solids) is the measurement used, and most eating grapes peak at 14 to 17.5 °Brix depending on the cultivar. Below that range, grapes often taste tart or flat.
- Seedlessness: For most home gardeners, seedless is the clear preference for fresh eating. Seeded varieties can taste excellent, but seedless grapes are far more practical and pleasant to eat and share with kids.
- Skin texture: Thin, tender skins that don't slip off or feel tough make a big difference in eating experience. Some American-type grapes have a 'slip skin' quality that's not to everyone's taste.
- Flesh texture: Firm, crisp flesh tends to be more enjoyable fresh and holds up better after picking. Soft, mushy grapes don't satisfy the way a firm cluster does.
- Cluster and berry size: Table grapes benefit from plump, well-filled berries. Small or sparse clusters can still taste fine, but presentation and yield matter for a home garden.
- Disease resistance: In humid regions especially, a variety that looks beautiful in a catalog but can't survive black rot or powdery mildew won't deliver good eating fruit. Resistance is a practical quality trait, not just a growing convenience.
Seedlessness deserves a special mention because it's often the deciding factor. If your goal is table grapes for fresh eating, seedless varieties are generally your best starting point. That's not just a personal preference point: university extension programs specifically recommend selecting for seedlessness when fresh eating is the primary goal. The varieties below prioritize that trait wherever possible.
Your regional shortlist: which varieties work where

This is where most articles fall short. They give you a universal list of 'great eating grapes' without telling you that Thompson Seedless will fail in Minnesota and Frontenac Gris is overkill in San Diego. Your region genuinely changes everything. Here's a practical breakdown by climate zone.
Hot, dry climates (California, Southwest, parts of the Southeast)
This is the sweet spot for classic seedless table grapes. Varieties bred for Mediterranean and inland climates thrive here with minimal disease pressure and long, hot summers that push sugar development. UC ANR specifically recommends Thompson Seedless, Flame Seedless, and Perlette as top home-garden table grapes for these regions. Flame Seedless produces beautiful red berries with crisp flesh and excellent flavor. Thompson Seedless is the benchmark for sweetness and is widely available. Perlette ripens early (a useful trait if you want fruit before summer peaks). For something more unusual, Muscat of Alexandria adds intense aromatic flavor if you can give it a long season.
Humid Southeast (Georgia, Carolinas, Tennessee, Gulf Coast)
Humidity is the enemy of European-style table grapes in the Southeast. Black rot, downy mildew, and powdery mildew can devastate susceptible varieties. Your best strategy is muscadine grapes (Vitis rotundifolia), which are native to the Southeast and naturally resistant to the diseases that kill European vines here. Carlos and Noble are classic choices. For bunch grapes, look at disease-resistant hybrids like Conquistador or the newer University of Florida releases. UGA Extension covers both black rot and powdery mildew as the primary disease threats for home bunch grapes in this region, and the guidance is honest: without good disease management, seeded or thin-skinned varieties will struggle.
Upper Midwest and cold-climate zones (Minnesota, Wisconsin, Iowa, Dakotas)
Cold winters (think Zone 4 and colder) eliminate most classic table grapes immediately. But the University of Minnesota breeding program has changed what's possible here. Marquette, Frontenac, and St. Croix were bred for wine, but for fresh eating in cold climates, look at Somerset Seedless, a seedless variety that survives to Zone 4 and produces sweet, pink berries with mild flavor. Swenson Red is another cold-hardy option with good fresh-eating quality. UMN Extension's table-grape guidance specifically flags Japanese beetle pressure and phylloxera as pest concerns in the Upper Midwest, so factor that into your management plan.
Mid-Atlantic and Northeast (Pennsylvania, New York, New England, Ohio)
This region sits in the middle: cold enough to exclude many Southern California varieties, humid enough to create disease pressure, but with long enough summers to ripen many hybrids beautifully. Concord is the classic American grape for this region and produces reliable, intensely flavored fruit, though it's seeded and slip-skinned (not everyone's preference). For seedless options, Canadice and Reliance are excellent: both are hardy to about Zone 5, seedless, and produce good fresh-eating quality. University of Massachusetts includes these in its seedless table grape recommendations for home gardens. Himrod is another seedless variety that ripens early and has a delicate, almost muscat-like flavor. Penn State Extension covers table grape production in detail for this region and emphasizes that variety selection based on site conditions is the most important decision you'll make.
Pacific Northwest (Oregon, Washington, Idaho)
Western Oregon and Washington have a tricky combination: cool, wet springs (hello, disease pressure) and often-short ripening windows west of the Cascades. OSU Extension makes an important point here: in some Pacific Northwest regions, late-season cultivars may not fully ripen every year. That's a real warning. Stick with early to mid-season varieties. Interlaken Seedless is an excellent early-ripening option. East of the Cascades, where the climate is hotter and drier, you have more flexibility and can grow many of the same varieties that work in California.
| Variety | Type | Seedless? | Best Regions | Hardiness Zone | Flavor Profile |
|---|---|---|---|---|---|
| Flame Seedless | European (Vitis vinifera) | Yes | California, Southwest, Hot Southeast | Zone 7+ | Sweet, crisp, mild |
| Thompson Seedless | European (Vitis vinifera) | Yes | California, Southwest | Zone 7+ | Classic sweet, neutral |
| Perlette | European (Vitis vinifera) | Yes | California, Southwest | Zone 7+ | Early, light, sweet |
| Reliance | American hybrid | Yes | Mid-Atlantic, Northeast, Midwest | Zone 5 | Sweet, mild, pink |
| Canadice | American hybrid | Yes | Mid-Atlantic, Northeast | Zone 5 | Sweet, fruity, red |
| Himrod | American hybrid | Yes | Northeast, Mid-Atlantic | Zone 5 | Delicate, muscat-like |
| Somerset Seedless | American hybrid | Yes | Upper Midwest, cold climates | Zone 4 | Sweet, mild, pink |
| Concord | American (Vitis labrusca) | No | Northeast, Mid-Atlantic, Midwest | Zone 4 | Bold, 'grape jelly' flavor |
| Interlaken Seedless | American hybrid | Yes | Pacific Northwest, Northeast | Zone 5 | Crisp, sweet, early |
| Carlos (Muscadine) | Muscadine (Vitis rotundifolia) | No | Southeast | Zone 7–9 | Rich, musky, distinctive |
Matching variety to your growing season
Ripening window is one of the most underappreciated selection criteria. Grapes are broadly grouped into early-season (ripening July to early August), mid-season (August to September), and late-season (September to October and beyond). In the eastern U.S., ATTRA notes that table grape harvest typically runs from July through September across most regions. That window is shorter than it sounds once you account for disease management and weather.
If you're in a short-season climate (northern states, high elevation, or the west side of the Pacific Northwest), early-ripening varieties like Perlette, Interlaken, or Somerset Seedless are your safest bet. Late-season cultivars in those zones risk a hard frost before the fruit finishes. In warmer climates with long summers, you can layer varieties to spread your harvest over six to eight weeks, which is one of the genuine joys of growing your own table grapes.
Ohio State recommends starting to taste-test your berries at around 15 °Brix after veraison (the point when berries change color and begin to soften) and sampling weekly from that point. Iowa State Extension adds that in addition to sugar levels, sensory indicators like berry aroma, flavor development, and seed color (seeds turn brown when ripe) are all useful maturity cues. Don't just rely on the calendar. The fruit will tell you when it's ready.
Setting up your grape garden: sun, soil, spacing, and trellising
Grapes are forgiving in a lot of ways, but they are not forgiving about sun. Both UC IPM and UMN Extension are emphatic on this point: grapes need full sun to provide the heat required to ripen fruit and ensure good fruitfulness. That means at least 8 hours of direct sun per day on your planting site. A shaded spot against a fence might seem cozy but it will give you weak, disease-prone vines and fruit that never reaches its flavor potential. If your yard has limited sun, choose your sunniest spot and don't compromise.
Soil preparation
Grapes prefer well-drained soil with a pH between 5.5 and 6.5, according to OSU Extension. Get a soil test before planting (your local extension office usually offers this service affordably) and amend accordingly. Grapes don't demand rich soil; in fact, overly fertile soil can push excessive leafy growth at the expense of fruit. Good drainage is more important than fertility. If you have heavy clay, consider raised rows or beds to keep roots from sitting in standing water.
Spacing
Penn State Extension recommends 7 to 8 feet between vines in the row for most table grape varieties, with row spacing of 8 to 10 feet if you're planting multiple rows. For a home garden with a single trellis run, 8 feet between plants is a practical default. Crowd them closer and you'll get poor air circulation, which feeds disease; space them further and you'll have gaps in your trellis canopy for years.
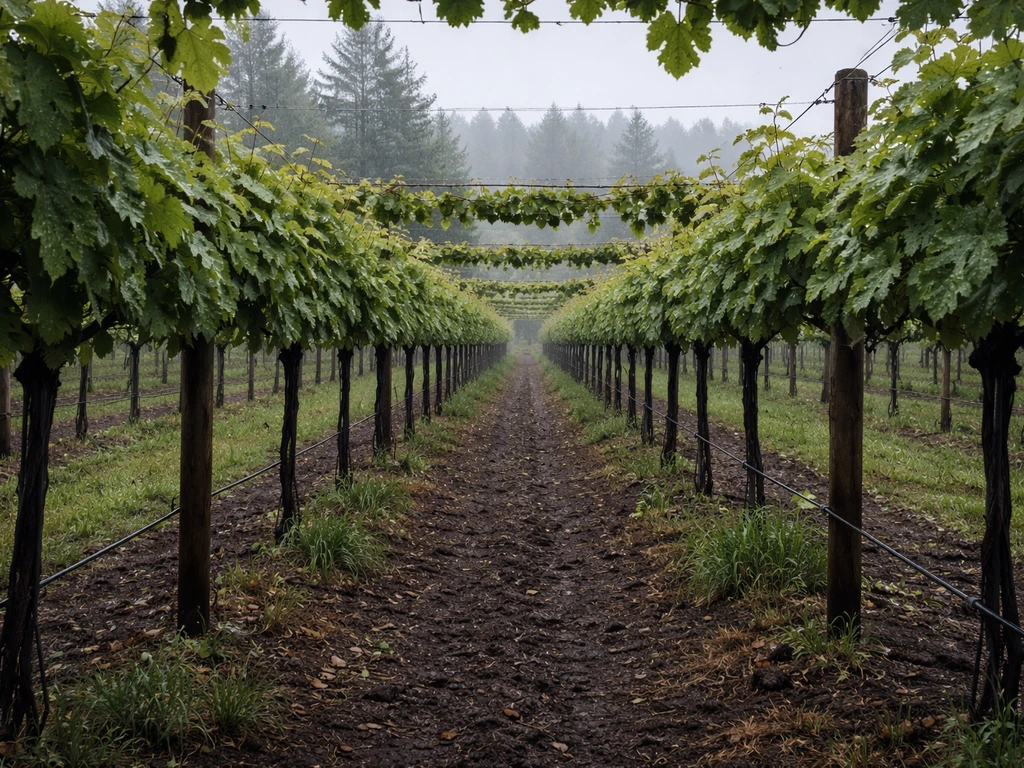
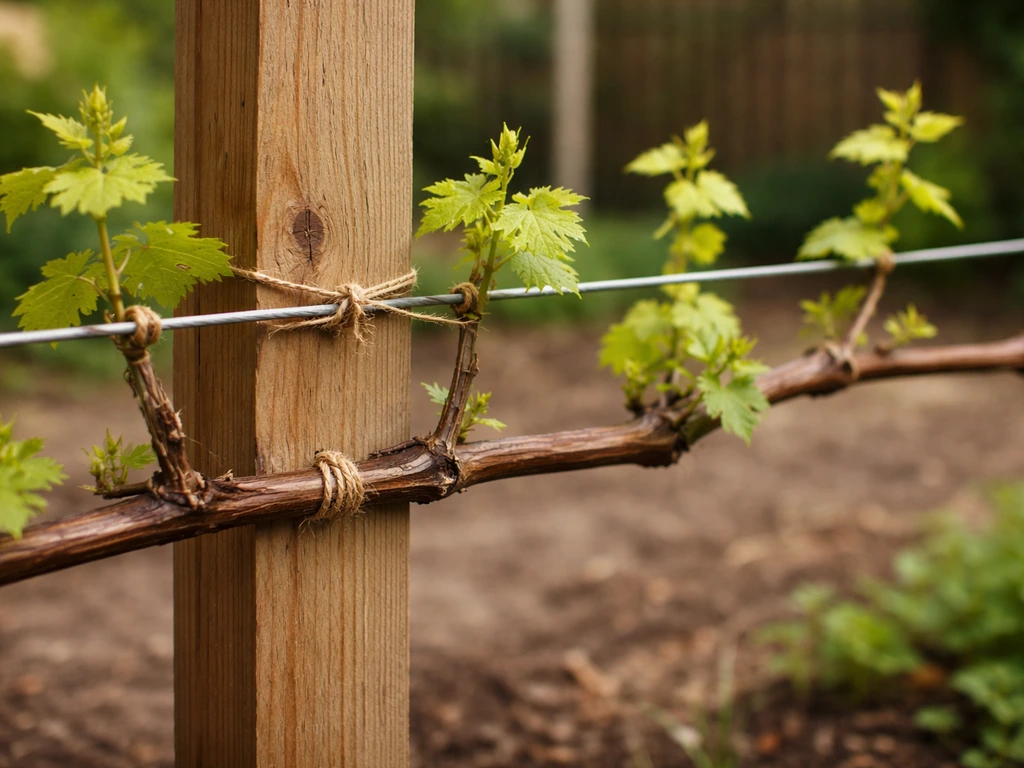
Trellising
Grapes need a trellis from day one, not 'eventually when they get big.' Install your trellis before or at planting time. The most practical home-garden system is a simple two-wire trellis: a bottom wire at about 3 feet and a top wire at about 5 to 6 feet, supported by posts every 15 to 20 feet. Utah State University Extension describes both cane and spur pruning systems and notes that the choice of system affects how you train vines from year one. For most home gardeners, a simple cane-pruned system (the Kniffin system) works well and is easy to manage. OSU Oklahoma Extension also recommends eliminating weeds in the planting rows during the establishment year, which is easier said than done but genuinely important for getting vines off to a fast start.
Planting timing
Plant bare-root vines in early spring as soon as the soil can be worked and frost risk is low. MU Extension reports that ideal planting windows run from March in southern Missouri to mid-April in northern Missouri, which is a reasonable general guide for the central U.S. In the Southeast, late winter planting works. In California, fall planting of dormant stock is also an option. Don't plant into frozen or waterlogged ground, and don't wait too long into spring once vines have broken dormancy.
Caring for your vines through the season
Watering
Established vines are more drought-tolerant than most gardeners expect, but they need consistent moisture during the first two growing seasons while roots develop. Water deeply and infrequently rather than shallow and often. In-row drip irrigation is ideal because it keeps foliage dry and reduces disease pressure. During fruit development (between berry set and veraison), uneven watering can cause berry splitting, which damages eating quality and opens the door to rot. Keep moisture levels reasonably consistent from June through harvest.
Fertilizing
Go easy with fertilizer, especially nitrogen. Heavy nitrogen feeding produces lush, dark-green canopies that look healthy but actually increase disease susceptibility and delay fruit ripening. In the establishment year, a light application of balanced fertilizer in early spring is sufficient. From year two onward, let a soil test guide you. If vines are growing vigorously and setting fruit well, they likely don't need much. Under-fertilizing is far less common a problem in home gardens than over-fertilizing.
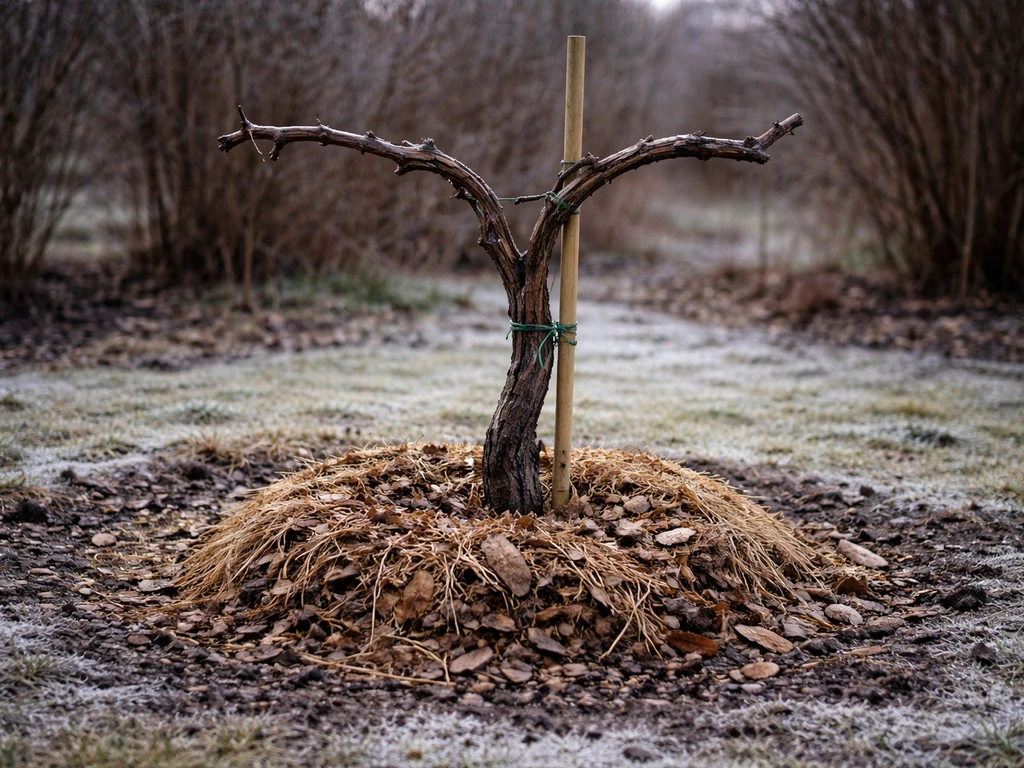
Pruning: the most important skill you'll develop
Pruning is where most home gardeners go wrong, usually by not doing enough of it. Healthy grape vines would set far more fruit than they can possibly ripen to good eating quality. UNH Extension is direct about this: you must prune annually when vines are dormant, and a common home-garden guideline is to prune canes back to about 10 buds per cane for a cane-pruned system. WSU Extension adds an important warning: leaving too many buds increases winter injury risk, especially in cold climates. More buds does not mean more fruit. It means more shoots, weaker clusters, and fruit that struggles to ripen properly. Prune in late winter while vines are fully dormant but before growth begins, typically February to early March depending on your region.
Protecting your crop: pests, disease, and birds
Fungal diseases
The four diseases most likely to ruin your eating grapes are black rot, powdery mildew, downy mildew, and Botrytis bunch rot. Black rot and downy mildew are the primary mid-summer cluster problems in humid regions, according to SDSU Extension. Downy mildew thrives in warm, humid weather and produces that characteristic fuzzy white growth on leaf undersides. Powdery mildew is particularly sneaky because MSU Extension explains it can compromise berry skin integrity, creating entry points for Botrytis and sour bunch rot later in the season. A well-timed fungicide program using copper-based or other labeled products (check your state's guidelines for days-before-harvest restrictions) is essential in humid climates. Disease-resistant varieties reduce but rarely eliminate the need for spray programs.
Insect pests
Grape berry moth is one of the most damaging insect pests for home fruit quality in the eastern U.S. and Midwest. The larvae bore into developing berries, creating entry points for rot and rendering clusters unsightly and inedible. The Grapes Extension Network emphasizes that management requires good timing, the right materials, and excellent cluster coverage. MSU Extension adds that late-season control just before harvest is critical. Japanese beetles are another mid-season problem in the Upper Midwest and East, skeletonizing leaves and weakening vines. Phylloxera, an aphid-like root pest, is a serious concern in some regions; UMD Extension notes that American-type grapes (Vitis labrusca and hybrids) are naturally resistant to phylloxera, while European vinifera types are susceptible. Illinois Extension adds that if you're planting grafted vines for phylloxera resistance, keep the graft union 4 to 6 inches above soil level.
Birds
Birds will find your grapes before you do. This is not an exaggeration. Starlings, robins, and mockingbirds are particularly aggressive and can strip a cluster in hours. Bird netting draped over the canopy just after veraison (when berries begin to color up) is the most reliable solution for home gardens. Fine-mesh netting designed for fruit works well. Some gardeners use visual deterrents like reflective tape or predator decoys, but birds eventually habituate to those. Netting is the only truly reliable option.
Harvest, flavor, and keeping your grapes tasting their best
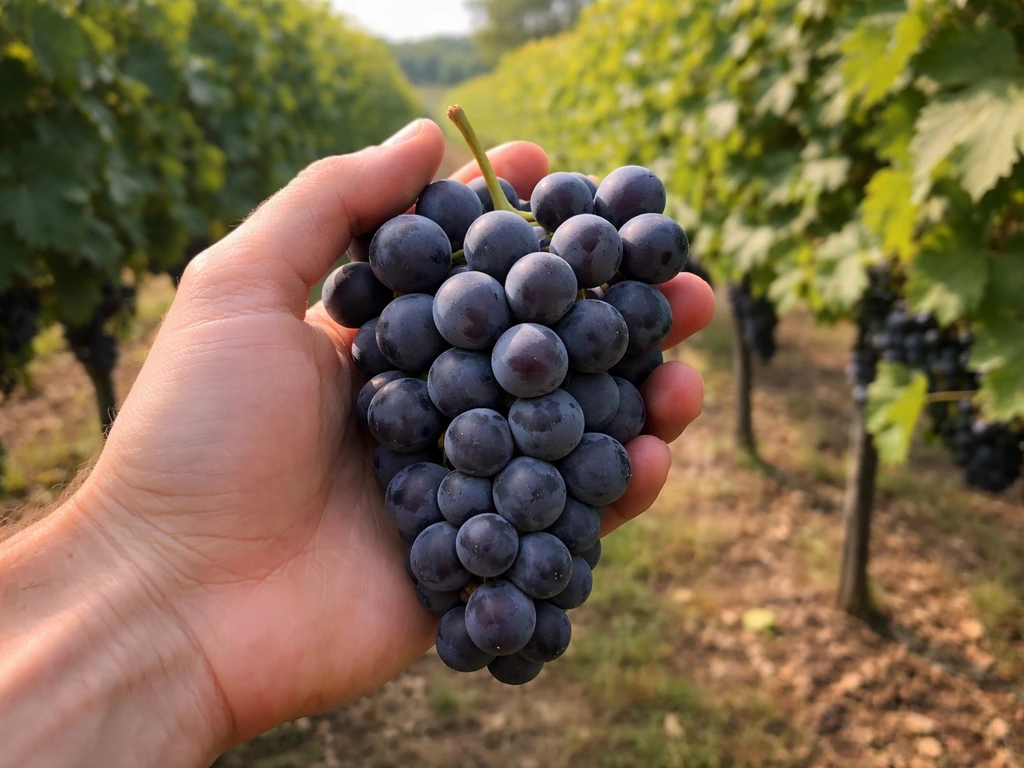
Grapes don't continue to sweeten after picking the way some fruits do. Once you cut the cluster, what you have is what you get. This makes harvest timing critical for eating quality. UMN Extension's advice is worth repeating: harvest as soon as grapes are ripe as your primary strategy for best eating quality. Don't wait for the 'perfect moment' another week away. Overripe grapes shatter off the cluster, soften, and become vulnerable to decay. The window of peak eating quality for most varieties is measured in days, not weeks.
Use both measurements and your senses to judge ripeness. If you have a refractometer (they're inexpensive and genuinely useful), check that berries have reached at least 15 °Brix before harvesting, and ideally higher depending on your variety. But also taste the berries, smell them, and look at the seeds. Brown seeds, developed flavor and aroma, and soft but not mushy texture all signal readiness. For red and black varieties, full color development is also a key marker, as UC Davis notes minimum color requirements for red and black cultivars as part of maturity evaluation.
Storing harvested grapes
UC Davis research on postharvest grape quality confirms that berry firmness is a major consumer acceptance factor and that temperature management is the most important variable for storage life. Harvest in the cool of the morning, refrigerate clusters promptly, and keep them dry. The Grapes from California storage guidance is clear: moisture decreases shelf life. Don't rinse grapes until right before eating, and don't store them near ice or water. Most home-grown table grapes keep well for one to two weeks in the refrigerator if harvested at peak ripeness and handled carefully. Soft, cracked, or shattered berries won't improve in storage.
Your first-season checklist and what comes next
Here's what a realistic first year looks like for a home grape gardener, from selection to end-of-season. If you're just starting, this is your roadmap.
- Pick 2 to 4 varieties suited to your region and hardiness zone using the shortlist above. Include at least one early-season variety and one mid-season variety to spread your harvest window. Prioritize seedless if fresh eating is your goal.
- Order bare-root vines from a reputable nursery in late winter (January to February) for spring planting. Local extension offices can often recommend regional nursery sources. Demand is high for popular varieties and stock sells out.
- Prepare your planting site 2 to 4 weeks before planting: get a soil test, amend to a pH of 5.5 to 6.5, and till or loosen the row to at least 12 inches deep. Install your trellis posts before vines go in the ground.
- Plant at the right time for your region: late March in the South and mild West, mid-April in the northern states and cooler regions. Set vines at the same depth they grew in the nursery, and water in well.
- In year one, focus on vine establishment, not fruit. Remove any flower clusters that form so the vine puts energy into root and shoot development. Keep the row weed-free. Water consistently. Tie growing shoots loosely to the trellis wire.
- Begin a basic disease management program if you're in a humid region. Early-season copper or sulfur applications target downy and powdery mildew before symptoms appear. Waiting until you see disease means you're already behind.
- Plan your dormant pruning for late winter of year two. Research the training system you've chosen (two-wire Kniffin is the simplest) and prune aggressively to the recommended bud count. This is the step most beginners skip, and it costs them years of good fruit.
- Install bird netting in year two and beyond, as soon as berries begin to color after veraison. Don't wait until you discover half the crop gone.
- In year three, expect your first meaningful harvest. Taste-test weekly after veraison using the 15 °Brix benchmark plus sensory cues. Harvest promptly at peak ripeness and refrigerate clusters dry and unwashed.
Growing table grapes at home takes patience in the early years but pays off with fresh fruit you genuinely can't buy in a store at that quality and ripeness. The key is matching variety to your actual climate, pruning without mercy, and protecting the crop in that critical window before harvest. If you want the best grape plants to grow for your home, start with varieties that match your climate first, then fine-tune the rest of your setup matching variety to your actual climate. If you're also thinking about container growing or want to explore options beyond the traditional trellis setup, growing grapes in pots is a viable path for small spaces and gives you some climate flexibility. The variety principles above apply just as much to container growing as to in-ground planting.
Start simple: two well-chosen varieties for your zone, a solid trellis, and a commitment to annual pruning. That alone will get you to a real harvest of genuinely excellent eating grapes within three seasons.
FAQ
Can I still get good eating grapes if my yard doesn’t get 8 hours of sun?
If you have partial sun (for example, 4 to 6 hours), you can still grow grapes, but choose a variety that ripens earlier and plan on training the canopy to capture maximum light (keep lateral growth trimmed and clusters positioned into sunny zones). If your site is consistently shaded late in the day, your fruit flavor usually will not match what full sun varieties deliver.
How do I prevent berry splitting if I miss a watering schedule?
For best flavor, aim to water in a way that avoids swings around berry set and veraison, when splitting risk is highest. In practice, this means checking soil moisture 2 to 3 inches down, then watering deeply only when that zone starts to dry, and using drip irrigation so foliage stays dry.
What should I do if my vines look lush but the grapes aren’t ripening well?
Don’t use high-nitrogen fertilizer to “push growth” after fruit set. If vines are making long, soft shoots but clusters look small or lag behind, pause additional nitrogen and rely on the trellis to distribute growth, then adjust next season using a soil test rather than adding more fertilizer right away.
Are grapes worth growing in containers in cold climates?
Yes, but you must manage risk differently. In cold zones, container grapes still need winter protection (move to an unheated garage or insulate the pot, and prevent waterlogged soil in freeze-thaw cycles). Many people also choose seedless cold-tolerant varieties first, because they tend to deliver better eating quality when the growing season is short.
Can I grow wine-grape varieties specifically for eating?
It’s possible, but many hybrids and American-type grapes taste noticeably different from classic “Mediterranean” table grapes. If you want the most predictable fresh flavor, start with a variety known for eating quality in your zone, and if you buy new plants, check whether they’re meant for table use versus juice or wine before planting.
What’s the best way to know when to harvest for eating, not just for color?
Start by tasting at the earliest “almost ripe” stage, then keep sampling on a set cadence (for many home gardens, weekly from veraison is reasonable). Look for brown seed development and aroma, not just color, because some varieties color up before sugars and flavor fully catch up.
Why are my berries splitting and rotting in spots, even though I’m watering?
Often, yes. If you see berries cracking or rot starting at the cluster, it can be caused by uneven moisture, but birds, berry moth feeding wounds, and powdery mildew damage can also create entry points. If damage is clustered around wounds or frass, prioritize pest and disease timing rather than only changing irrigation.
Should I choose seedless grapes even if I’m okay with seeds?
If your primary goal is eating and you want easy cluster quality, prioritize seedless varieties first. If you do grow seeded types, plan for more careful pruning and cluster thinning so fewer berries ripen together and you get the best chance at flavor, since seeded cultivars often have a narrower margin for peak eating quality.
How do I improve airflow to reduce mildew on table grapes?
Keep your trellis-trained structure open, so air moves through the canopy and clusters dry faster after dew or rain. That means not crowding plants, removing excessive shoots during the growing season as needed, and ensuring you can access clusters for netting and pest inspection.
When should bird netting be installed, and how secure does it need to be?
For most home gardens, netting should go on right after veraison and be secured so birds cannot slip under the edges. Check it frequently, especially after storms, because even small tears can turn into large bird damage quickly once birds discover the fruit.
Can I skip fungicide sprays if I choose a disease-resistant grape variety?
Yes, but do it strategically. If you see consistent disease pressure, scale back fertilizing and focus on variety selection next season, plus prune correctly to open the canopy. Many gardeners also adjust spray timing, but only according to local label directions and days-to-harvest rules.
What’s the most common container mistake that hurts eating quality?
The spacing guidance in-ground is usually different than containers, but a common mistake is using too small a pot that overheats or dries out, which then stresses vines and affects fruit quality. If you go container, ensure the pot is large enough for stable moisture and use drip or scheduled deep watering rather than frequent light watering.